This is the first iteration of my website. For years I wanted my own little place people could visit. A location, where I could showcase my work to the world. This was my first attempt at creating anything of subtance on my own.
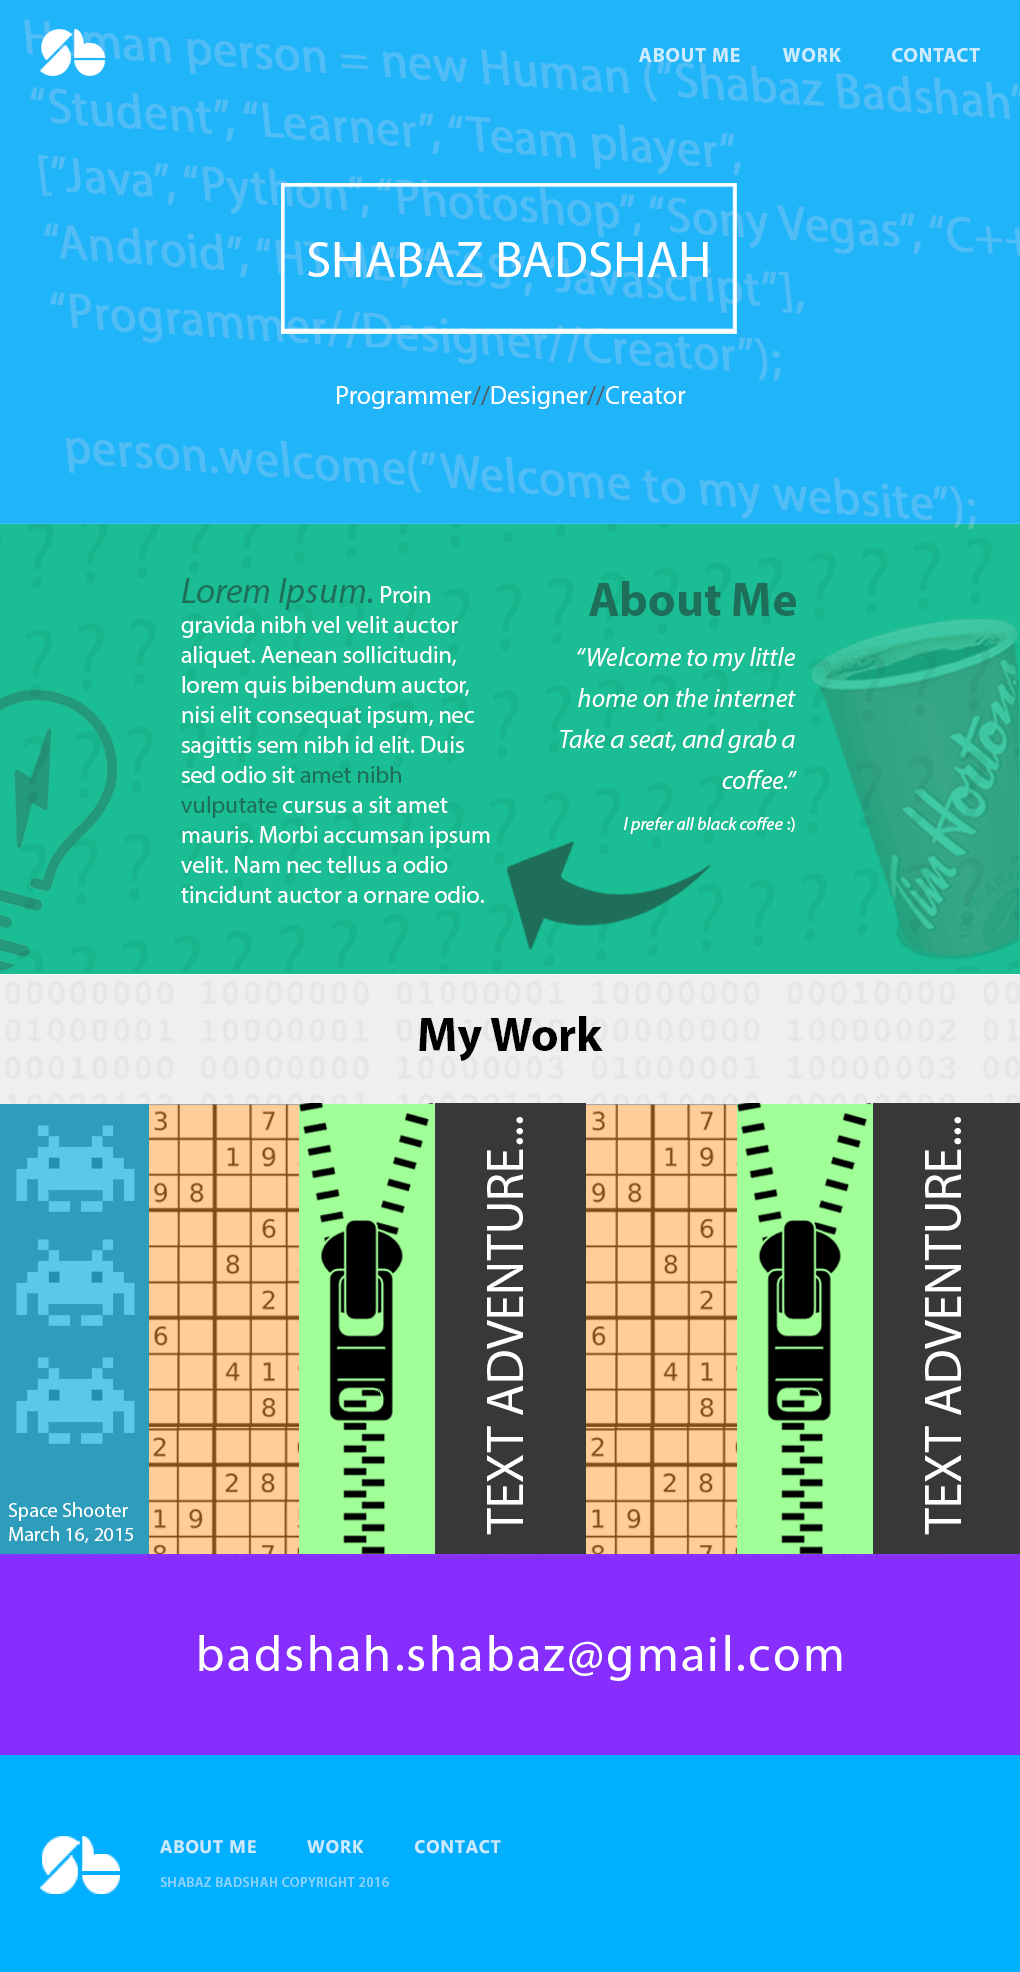
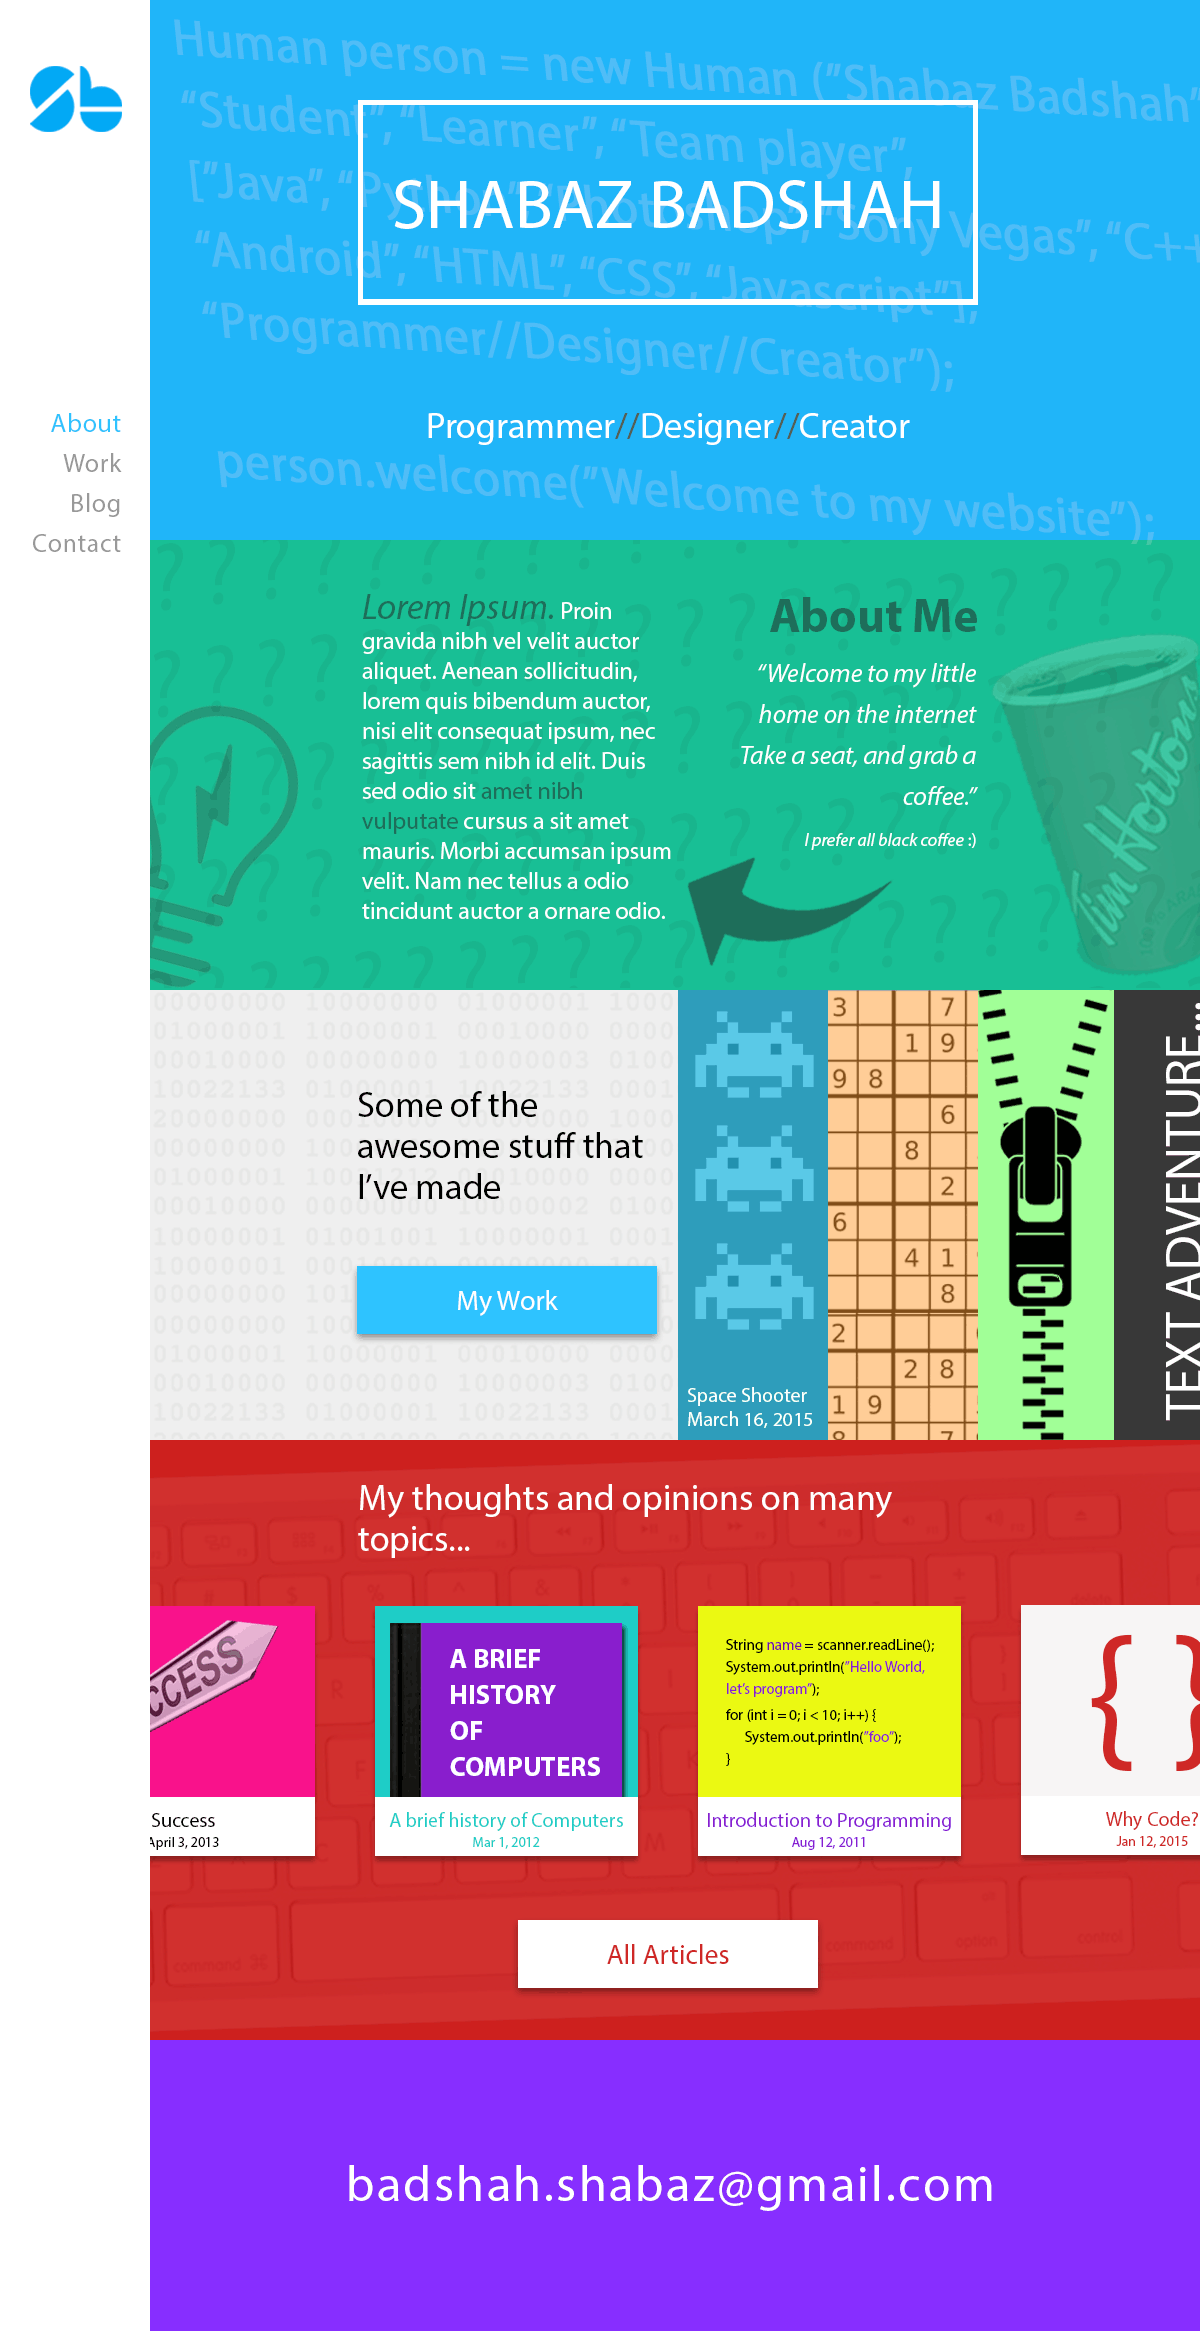
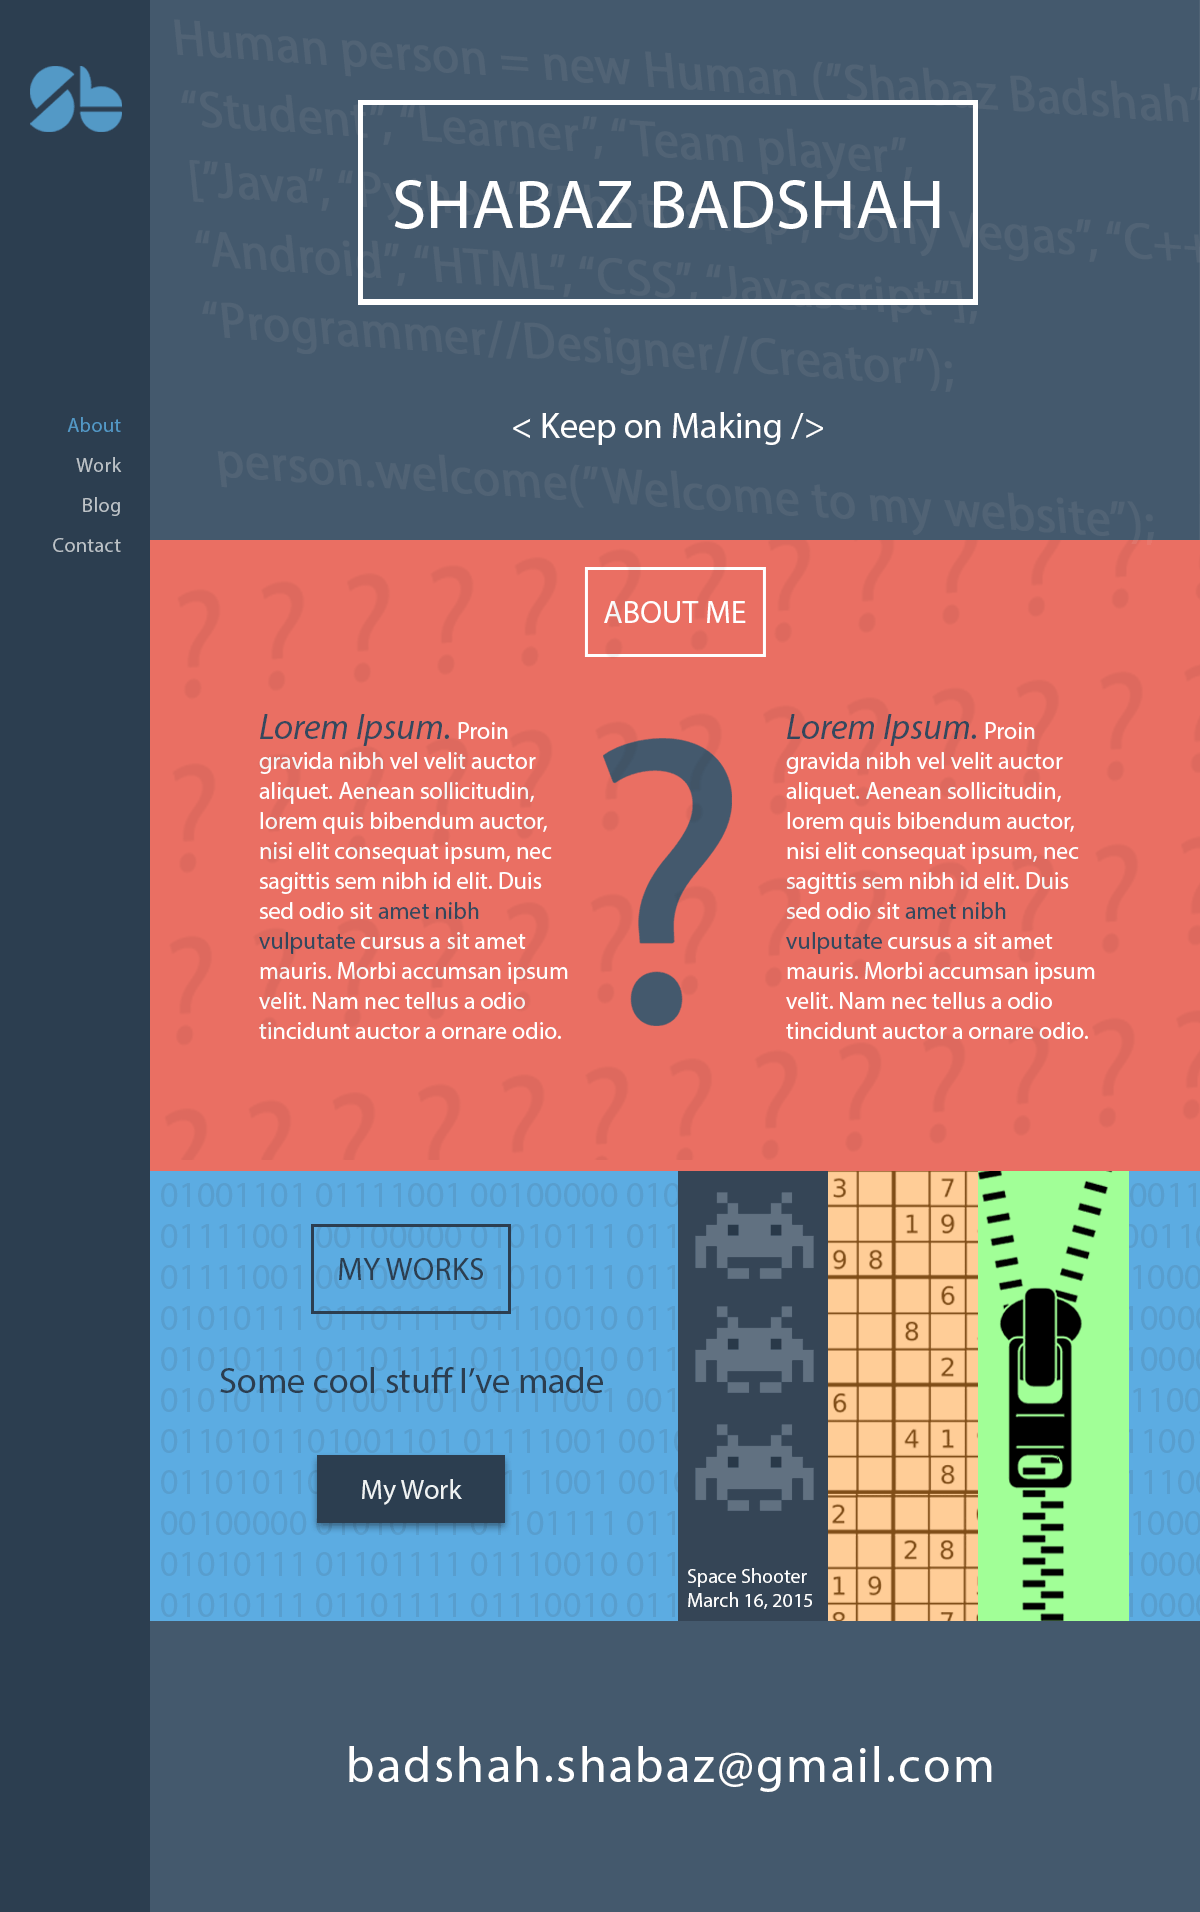
Everyone needs home on the internet, and this is mine. I created this website as an online portfolio to showcase my work and skills. About 1.5 weeks was spent on planning, design, and site architecture. In addition, this project is a showcase of my complete web development workflow and development process. This will be a lengthy read. Enjoy :)
Tools, Technologies, and Skills
- Atom Text Editor for website creation
- Photoshop for website mockups
- Jade for HTML markup
- jQuery
- Sass CSS preprocessor
- Github for version control and hosting
- Jekyll for static website templating
- Gulp build system for project resources and tools management
- Autoprefixer for cross browser compatibility
Planning
As the years have passed, I've become more process focused as an individual, and professionally. Process allows you to work faster because you are aware of the general workflow being utilized. In addition, it allows teams and collaborators to better understand and work on the project in the future.
My general workflow for this project went along the lines of, plan and draft website mockups, create the website while utilizing the drafts as a basis for the CSS, refractor project for consistency, and finally take care of the smaller things such as image compression and performance. Thus, I begin at the initial planning and drafting stage.
This initial drafting stage was vital for this project, because from previous web development experience its really difficult to create a site when you're making things up as you go. So, I got out a piece of paper and starting drawing whatever came to mind. I had decided that my homepage had to be very modular in design; so, I used a "block" system to create each of the individual sections. This would allow me (in the future) to add and remove sections I needed with minimal to no modification of the markup/CSS. Furthermore, each section could have its own distinct style if needed without modification required to any other section. Below are the sketches I created as a basis for the design and layout of the site. I spent about 3 days thinking about and drafting the site.
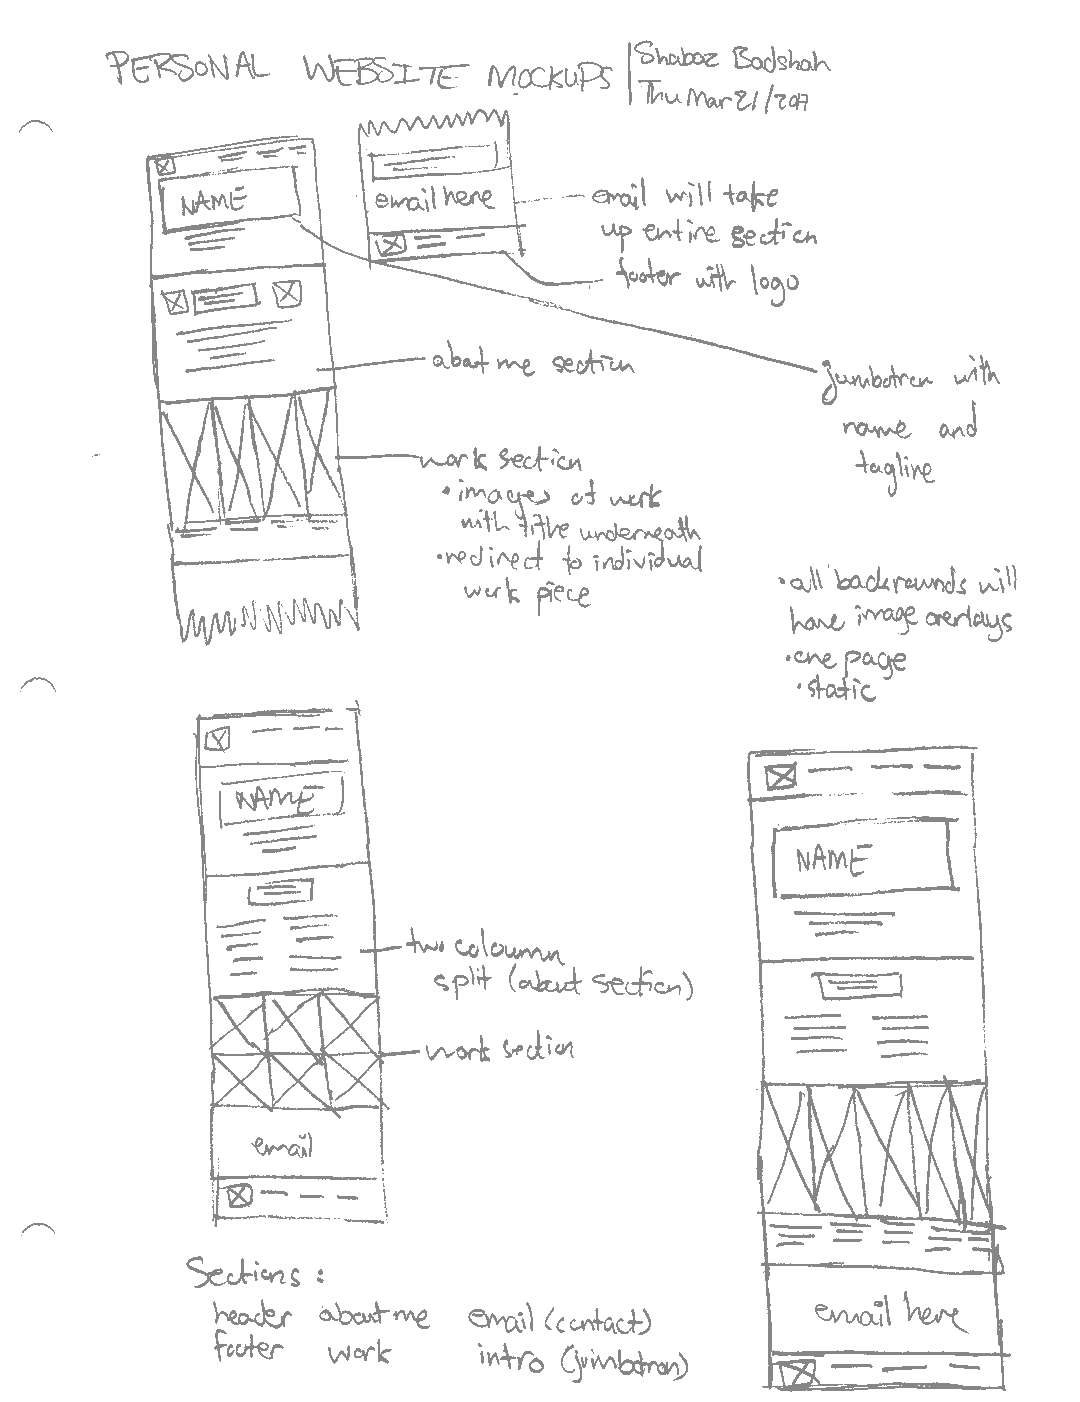
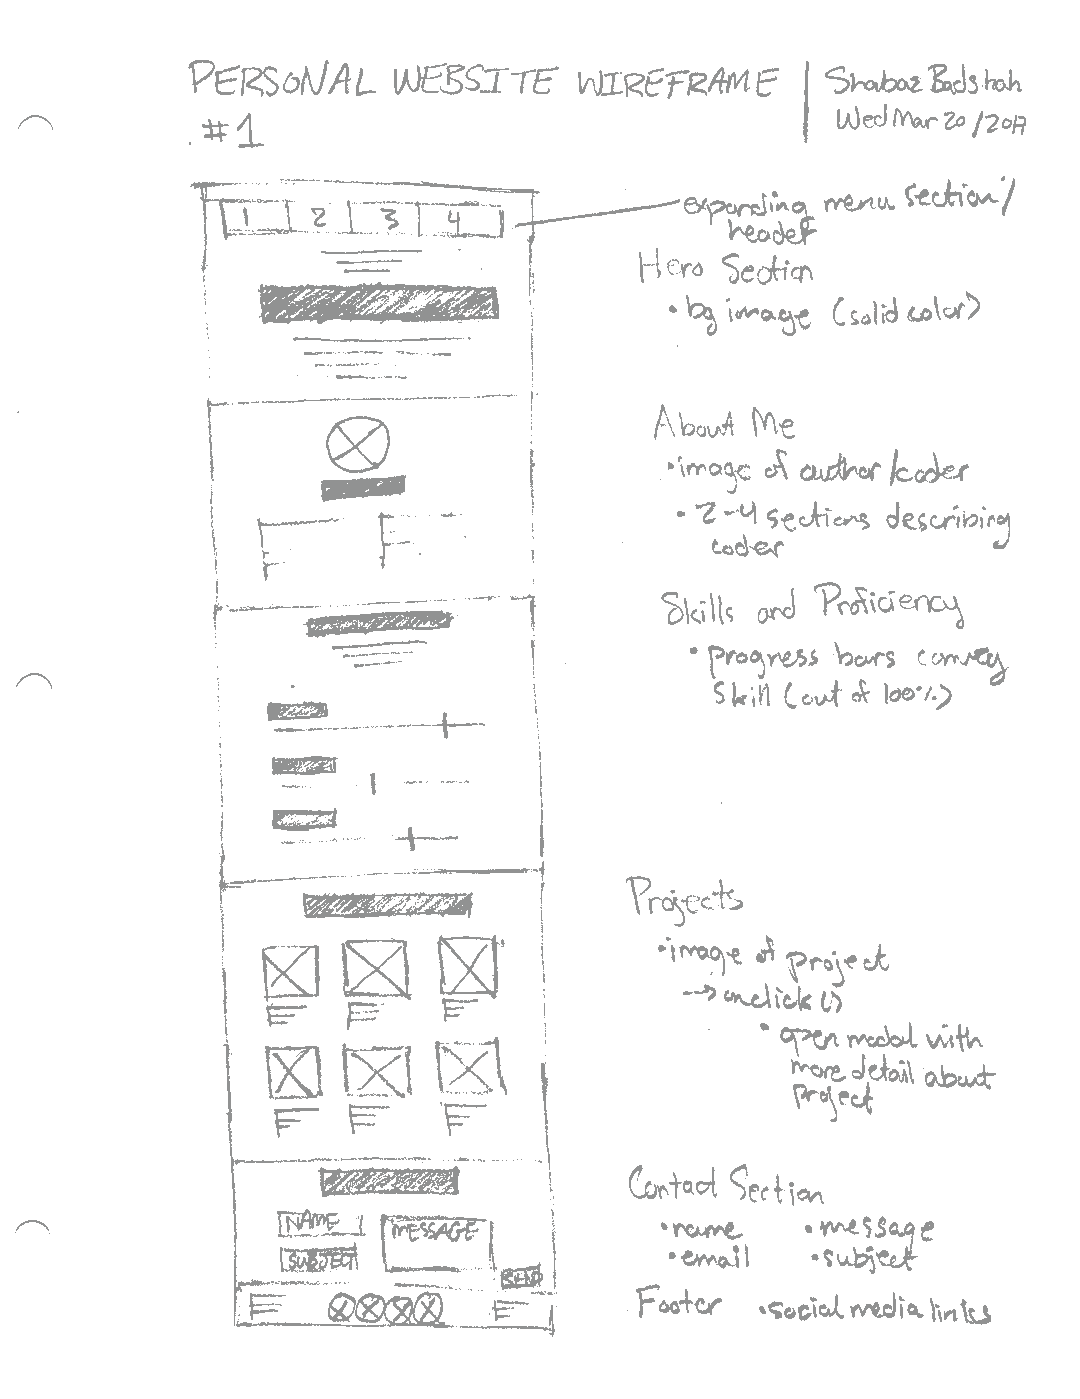

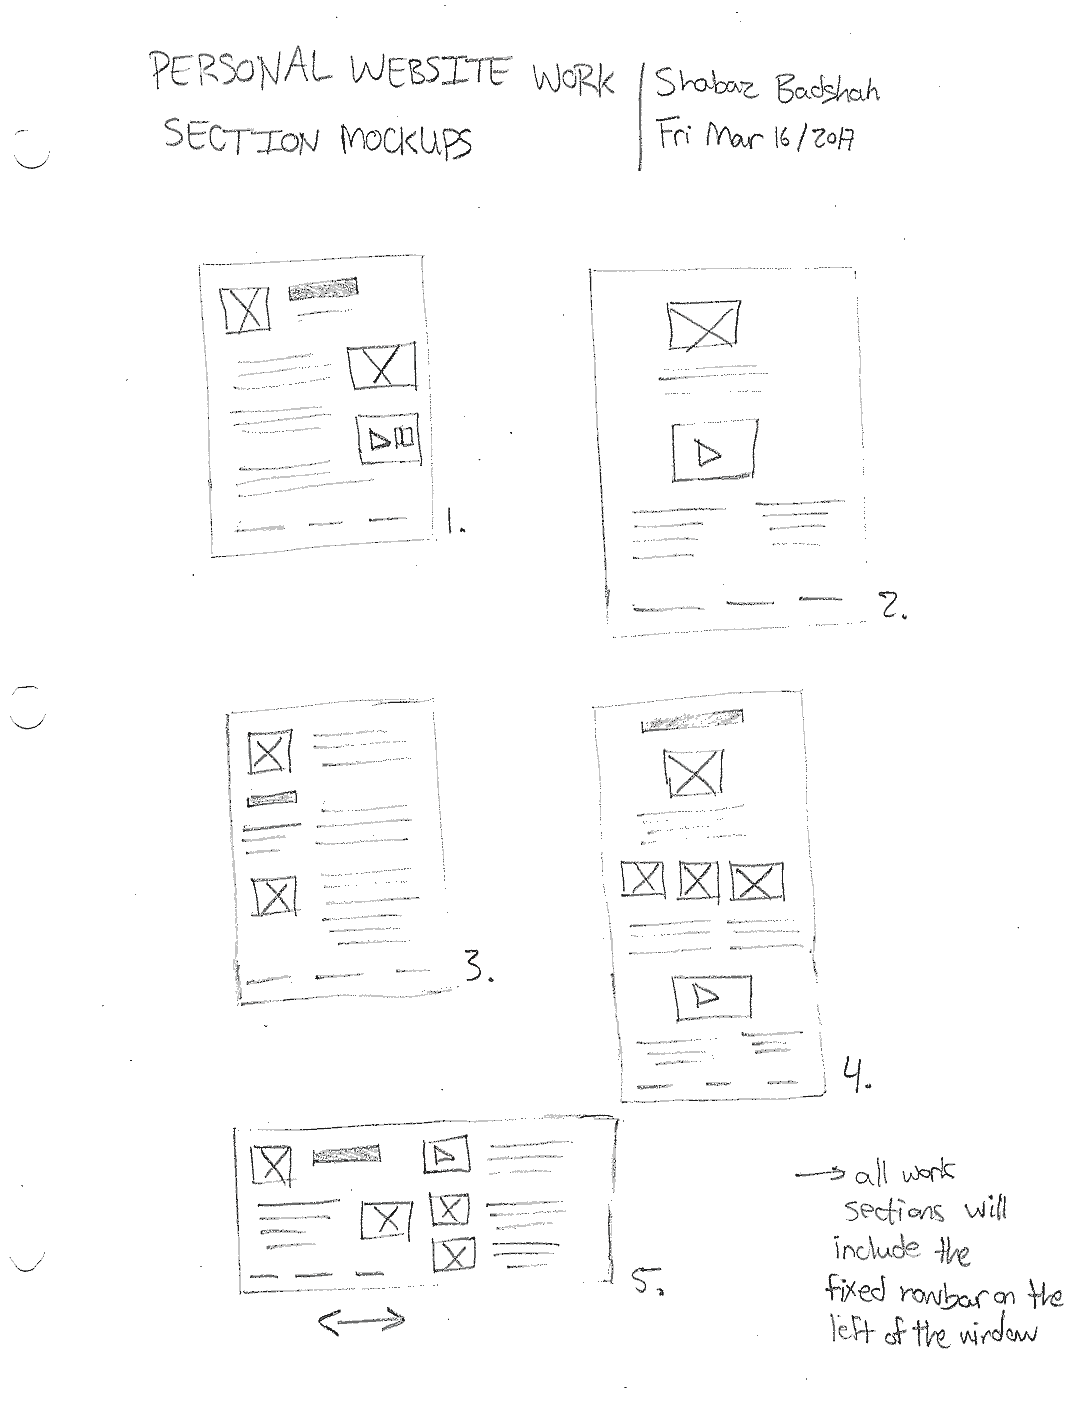
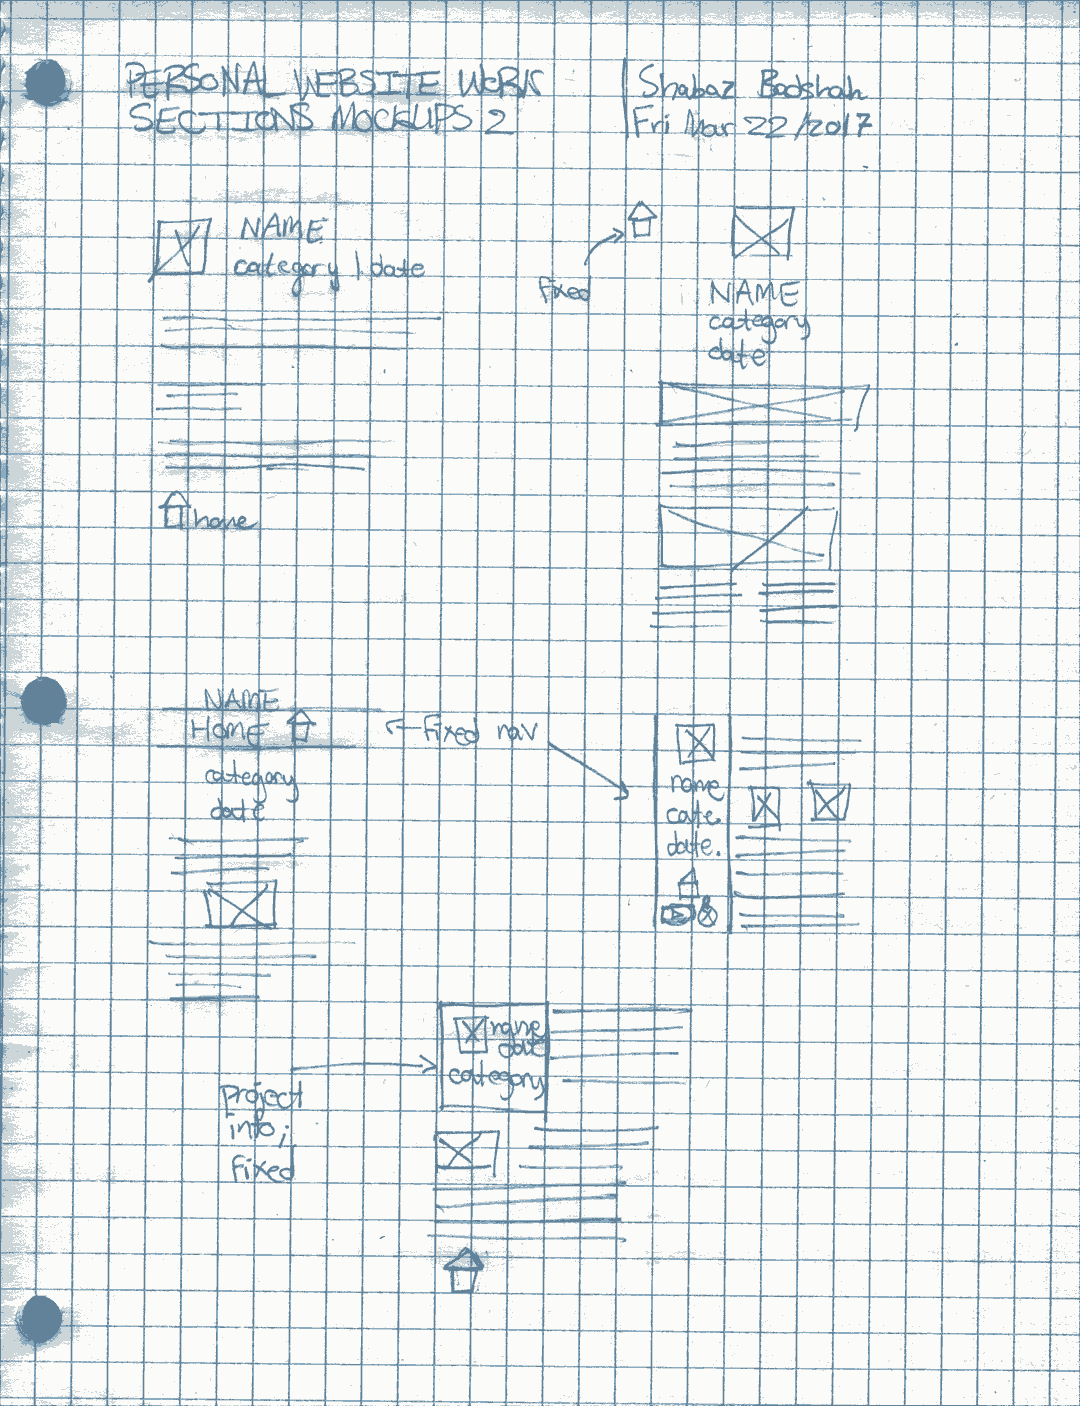
Once the initial drafts were complete, I moved onto the photoshop mockups of the ones that I preferred. This was the newest stage I added to my workflow, and it was without a doubt the most referenced and helpful stage in the creation of my site. As I created mockups, I took parts of what I liked about the previous designs/mockups and added them to the new ones. Below are the photoshop mockups that I designed/created.
The Photoshop mockups of the possible final designs of the website
Website Creation and My Tooling System
Now came the actual work, creating the website. The creation took the longest part, more specifically the CSS. I knew before development that this website needed to be modular, scalable, and would be large and I would need many tools to assist in this. Once I began the implementation the photoshop mockups became vital, as I would refer back to them constantly; changing/modifying sections as needed. The Jade and Sass files were very easy to implement due to their very simple markup (any my tooling system). The remainder of the development was just the regular ol' CSS.
As this was the first workflow that I created and utilized (and will continue to utilize in the future) there was a significant amount of prep work involved for the aforementioned tooling system. I have included all the tools in the Technologies Used section.
I being with Jekyll. This was the basis of my tooling system. Jekyll would allow me to build static websites by using template where individual HTML/CSS content could be injected into upon running a jekyll build or upon uploading the site to Github Pages. Jekyll would also allow me to effortlessly add additional content (in my case, projects) by adding the to the _posts directory. This would ensure that when I want to add a new project I will just have to create the project specific CSS and HTML markup, and it will take care of the rest.
Next, Gulp. Think of Gulp as the thing that will hold all my tools together. Tools such as Jekyll, Autoprefixer, Sass, and Jade. Gulp also has some cool tweaks that have saved me countless hours and sanity. The most prominent being autorefresh which live-loads the site when you save your work via Ctrl+S; if I were to keep one tool during this process, this would be it. In addition, Gulp allowed me to use Sass and Jade together in the same project. Gulp will take the Sass and Jade files, convert them to CSS and HTML respectively, and put them in their correct folders for Jekyll to serve the website from. Sass also supports imports of other Sass files, allowing for more modular and maintainable CSS.
Finally, autoprefixer assured cross browser compatibility. It takes the CSS from CSS files and adds all the appropriate modifiers for webkit, mozilla, etc.
My folder structure was also imperative for organization of this project:
_includes _jadefiles _layouts _posts _site assets ├── css │ ├── 0 - tools │ ├── 1 - base │ ├── 2 - modules │ ├── 3 - sections │ └── 4 - layouts ├── img ├── js └── project-assets
-
__includes, contains the processed HTML files that were converted from their respective Jade counterparts
-
_jadefiles, contains the Jade markup for the site, this will be processed and inserted into the _includes directory
-
_layouts, contains the templates for which the content can be injected into
-
_posts, contains the HTML markup for each individual project item, Jekyll loops through this when showing all the projects
-
_site, the folder that holds the final site after its been processed by Jekyll, Github Pages serves the site from this folder
- 0 - tools, contains libraries and other addons (i.e. bourbon, lightbox normalize.css, animate.css)
- 1 - base, contains all colors used in the website, variables (such as sidebar width), and a base Sass file which has custom CSS for things such as paragraphs and images
- 2 - modules, contains the CSS of modules that will be used all over the website (such as the sidebar seen on every page of my site)
- 3 - sections, contains the CSS for all the different section on the home page (i.e. about, contact, portfolio, hero)
- 4 - layouts, contains the primary layouts of different pages on the site (i.e. the homepage and the projects-list page) project-assets, contains the styles, images, and other resources for each individual project from the _posts directory
Challenges, Issues, and their Resolutions
There wasn't one "challenge" that hindered my progress throughout this project. The challenges were a plethora of smaller issues such as Github Pages (used for hosting the site) not loading images correctly because they required absolute paths and not relative ones. Others minor challenges included the usual stuff such as items not aligning, media queries overriding eachother, handling the CSS for images not working correctly, etc. The resolutions to these challenges weren't elaborate or are worth explaining (if you do have any questions, you can email me), they usually just required a quick google search or a couple minutes determining a solution.
What did I Learn During this project, I challenged myself to use jQuery as I had never used it before. The best way you can learn something is by "doing it", and learning jQuery was no different. The process of learning this topic was essentially referring back to the documentation of jQuery and how it did things differently. I have a lot of previous programming experience, so it was quite simple to learn.
In addition, I did learn a couple of smaller topics such as the difference between absolute and relative paths, the basics of the Gulp build system, the Jekyll static website generator, Sass, and Jade, more typography, and more on good compositions and layout. One of the more interesting topics that I learned during the later ends of development was image compression (I went off on a 2 days tangent learning about this). I did dive into the "maths" behind how different image formats work (it was quite awesome) and which ones were the most efficient to use for smaller file sizes. I ended up utilizing the PNG file format since it works better the JPEG for images with solid, well-defined colors (which my site contains a plethora of).
This project has ultimately been one of practicing my design and development skills, but also of becoming a more structured and organized individual and focusing significantly more on process (which I have learned the true value of).